Tesla Model 3 Roof Trim Replacement: DIY Guide (Save €200+)
The roof trim on your Tesla Model 3 — officially called the "Upper Brightwork" — is the chrome or black strip running along the edge of the glass roof. It takes abuse from car washes, tree branches, and parking garage mishaps. When it gets damaged or you want to do a chrome delete, replacing it is a straightforward DIY job.
Tesla Service wants €300-500 for this repair. You can do it in 20-30 minutes for the cost of the part.
This guide follows the official Tesla Service Manual procedure (Correction Code 12200302).
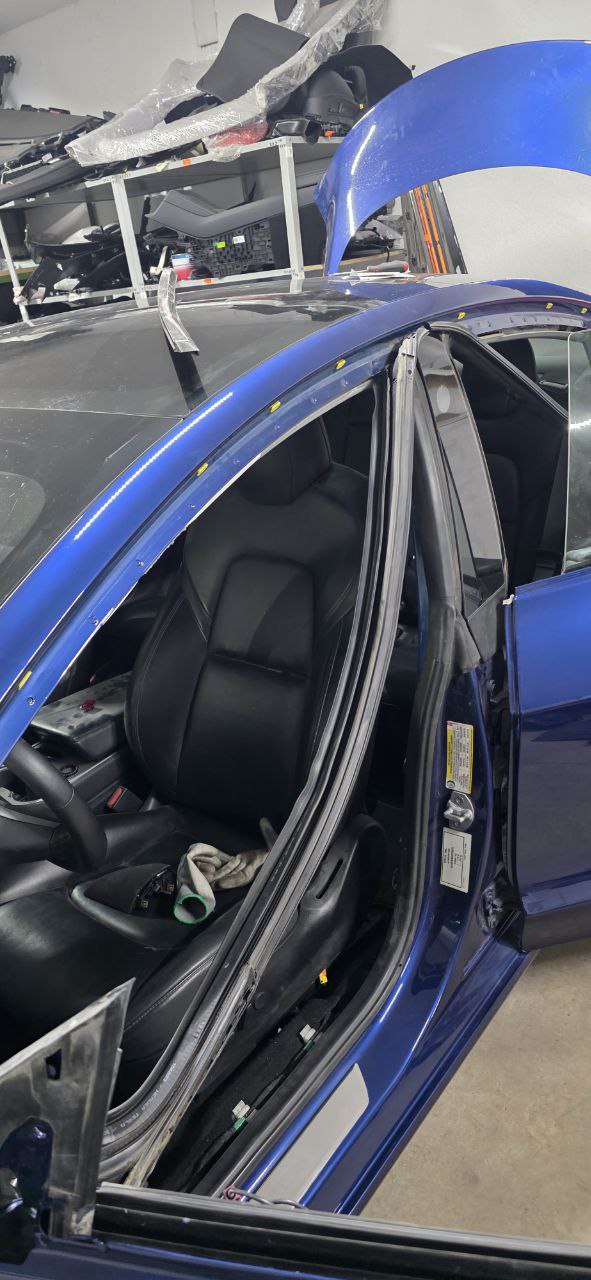 2018 Model 3 with roof trim installed — note the screws securing it to the body
When to Replace the Roof Trim
- Damaged trim — scratches, dents, or peeling chrome from car washes or impacts
- Chrome delete — swapping chrome for black trim for a refresh look
- Wind noise — loose or misaligned trim causes whistling at highway speed
- Glass replacement prep — trim must come off for roof glass work
Parts You'll Need
| Part | Notes |
|---|---|
| Upper Brightwork LH (driver) | Part number varies by year and finish |
| Upper Brightwork RH (passenger) | Same note as above |
| Grommets (10 per side) | Always replace — these are one-time-use parts |
OEM parts available from RR Car Parts or through Tesla Service.
Tools Required
- Torx T20 socket (required for the 10 screws)
- Plastic trim removal tool (for the push rivet)
- Isopropyl alcohol wipes (for cleaning grommet holes)
- A helper (recommended for the rear quarter glass section)
Torque Specifications
| Fastener | Torque | Tool |
|---|---|---|
| Screws attaching brightwork to body (x10) | 1 Nm (0.7 lb-ft) | Torx T20 |
That's very light — basically finger-tight with a short driver. Don't overtighten.
Step-by-Step: Removing the Roof Trim
Step 1: Open the Doors
Open both doors on the side you're working on. This gives you access to where the trim meets the door seals.
Step 2: Release the Door Seals
Pull down to release the front and rear primary body seals from the upper brightwork.
Note: You don't need to release the seals from the top of the B-pillar applique.
 Pull down on the door seals to release them from the trim edge
Step 3: Remove the Fasteners
The trim is secured by 10 Torx T20 screws and 1 push rivet.
Using your T20 socket, work from front to rear removing all 10 screws. Then remove the push rivet with a trim tool.
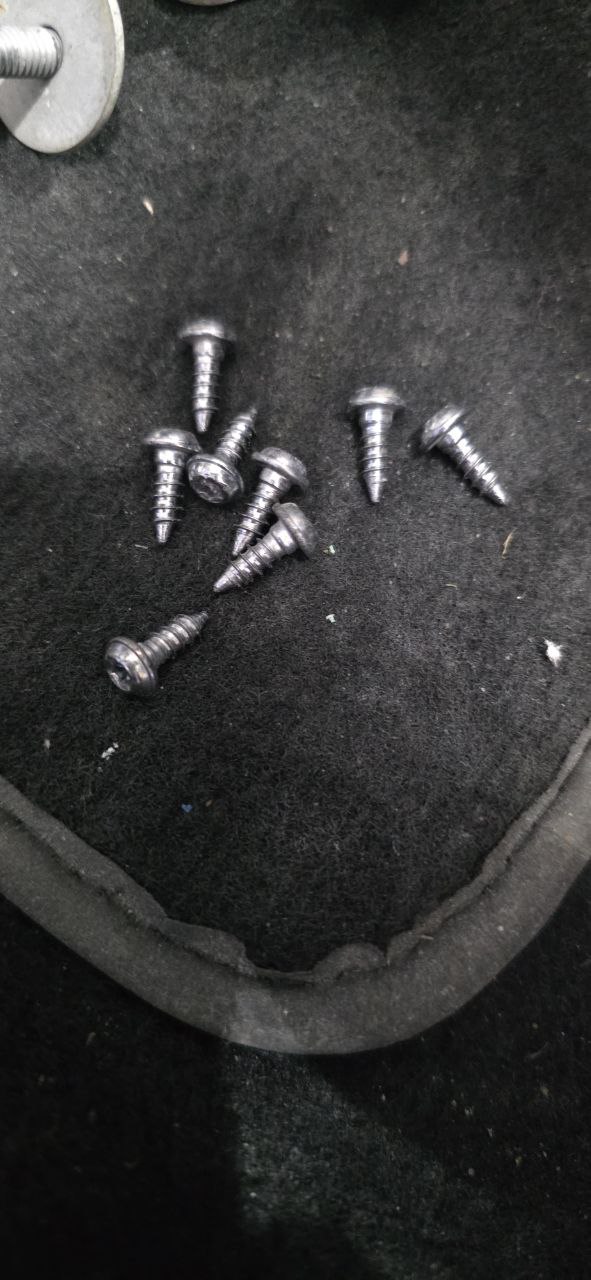 T20 Torx screws secure the trim — there are 10 of them plus one push rivet
Step 4: Remove the Trim
⚠️ Caution: Get a helper when removing the trim near the rear quarter glass to minimize the risk of scratching the paint.
With all fasteners removed, carefully lift the trim away from the vehicle. The trim comes off as one long curved piece.
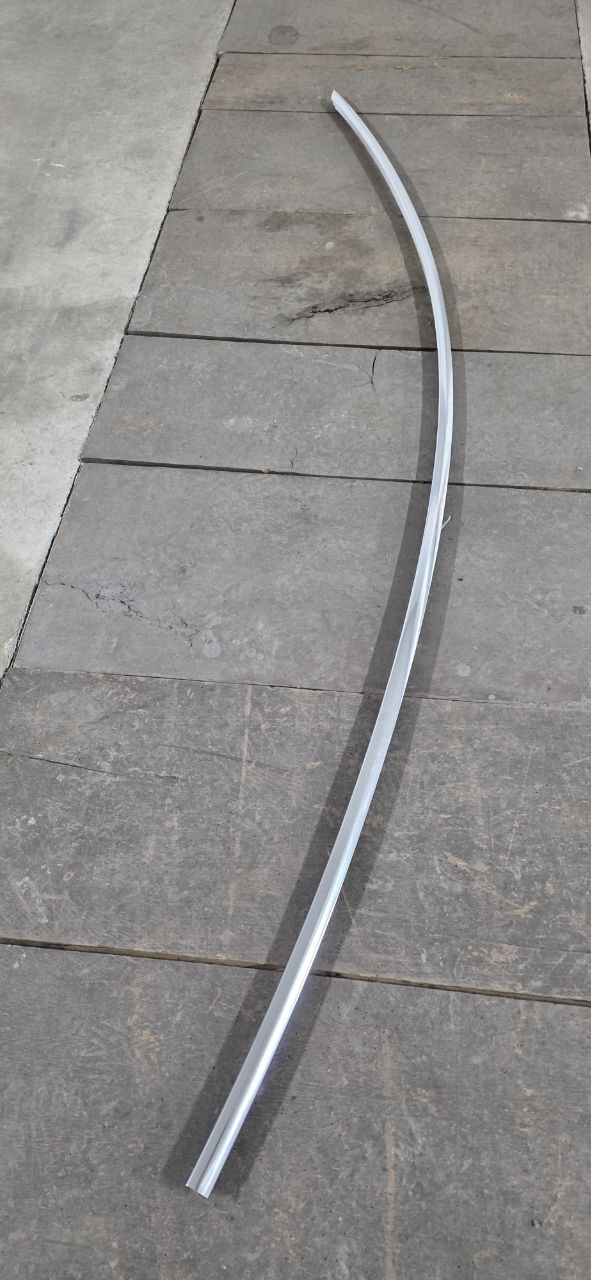 The upper brightwork after removal — about 1.5 meters long
Step 5: Remove and Discard the Grommets
Remove all 10 grommets from the body and discard them. These are one-time-use parts and must be replaced.
 The grommets must be replaced — don't reuse the old ones
Step-by-Step: Installing New Trim
Installation is the reverse order — work from rear to front.
Step 1: Clean the Grommet Holes
Wipe each grommet hole with an isopropyl alcohol wipe. This ensures the new grommets seat properly.
Step 2: Install New Grommets
Press all 10 new grommets into the body where the upper brightwork will install.
Step 3: Seat the B-Pillar Seals
Press the seals into the body at the B-pillar corners before installing the trim.
Step 4: Position the Trim
With a helper, carefully position the rear of the trim into the rear quarter glass area first. This is the trickiest part — take your time.
Step 5: Install the Fasteners
Working from rear to front, install all 10 screws and the push rivet.
Torque the screws to 1 Nm (0.7 lb-ft). That's basically hand-tight — don't crank them down.
 Work from rear to front when installing screws — opposite of removal
Step 6: Reattach the Door Seals
Press up to fasten the rear and front primary body seals onto the brightwork.
Important: Work from the rear corner of each seal forward. Make sure the seal fully engages the brightwork. When installed correctly, the seal edge should not be visible.
Push the seal into each corner to ensure it's evenly distributed.
 The seal edge should not be visible when properly installed
Step 7: Final Check
Close both doors and verify:
- Trim is evenly seated along its entire length
- Gaps are uniform at both ends
- No visible seal edges
Take a test drive and listen for wind noise.
Pro Tips
Always replace grommets. They're designed for single use. Reusing old grommets is why people get rattles and wind noise.
Clean with IPA first. Isopropyl alcohol removes residue that prevents grommets from seating properly.
Work rear-to-front on install. This is the opposite of removal and ensures proper alignment at the B-pillar.
Don't work in extreme temperatures. Cold plastic cracks, hot plastic warps. A shaded garage is ideal.
Get a helper for the rear section. Tesla specifically recommends this to avoid paint damage near the quarter glass.
Troubleshooting
| Problem | Likely Cause | Fix |
|---|---|---|
| Wind noise after install | Seal not fully seated | Reseat seals, ensure edge not visible |
| Trim won't align | Working wrong direction | Install rear to front |
| Screw won't tighten | Reused old grommets | Replace grommets |
| Gap at B-pillar | Started from wrong end | Remove and re-install from rear |
Cost Comparison
| Option | Cost | Time |
|---|---|---|
| Tesla Service Center | €300-500 | 1+ hour wait |
| Independent body shop | €150-250 | 30-60 min |
| DIY | €50-150 (part only) | 20-30 min/side |
You save: €150-400
That's real money back in your pocket for 20 minutes of work per side.
Technical Reference
- Tesla Procedure: Brightwork - Upper - LH (Remove and Replace)
- Correction Code: 12200302
- Tesla FRT: 0.36 hours per side
- Torque Spec: 1 Nm (0.7 lb-ft)
- Fasteners: 10× T20 screws, 1× push rivet
Related Guides
This guide is verified against the official Tesla Model 3 Service Manual (2017-2023). Have questions or tips? Drop a comment below.

🛠️ Tools Needed for This Repair
These are the tools I personally use and recommend. Using quality tools makes the job easier and safer.
-
Torx T20 Socket
-
Plastic Trim Removal Tool Set
-
Tesla Model 3 Roof Trim (OEM) RR Car Parts 🇪🇺
-
Isopropyl Alcohol Wipes
-
iFixit Pro Tech Toolkit View on iFixit
We earn commissions from qualifying purchases through our affiliate partners. This helps support the site at no extra cost to you.