Tesla Door Handle Not Working? DIY Fix Guide (2026)
Tesla door handles are one of the most common failure points on any Tesla model — especially the motorized presenting handles on Model S and Model X. Model 3 and Model Y have simpler push-button mechanical handles, but they're not immune to problems either. This guide covers every failure mode, from a quick software fix to full handle replacement, with 2026-verified torque specs throughout.
Types of Door Handle Problems
Different Tesla models have different door handle designs:
Model S & Model X (pre-2022): Motorized handles that flush-mount and present (pop out) when you approach or touch the handle area. Model 3 & Model Y: Push-button mechanical handles with a small thumb button and integrated release cable. Model S Highland / Model X (2022+): Flush touch handles — no motor, activated by capacitive touch + electronic latch.
Common symptoms include:
- Handle won't present when approaching (S/X)
- Handle presents but door won't open
- Handle feels loose or floppy
- Handle stuck in extended position (S/X)
- Clicking sound but no movement
- Handle works intermittently
- Handle frozen in cold weather
- "Handle Error" or door alert on touchscreen
Step 0: Try a Software Reboot First
Before touching any hardware, try a soft reboot. On motorized handle Teslas (S/X), handle failures are sometimes caused by software glitches that a reboot clears.
To soft reboot:
- Sit in the car with the door closed
- Hold both scroll wheel buttons simultaneously for 10 seconds
- The screen goes black and reboots (~30–60 seconds)
- Test the handles after reboot
This costs nothing and resolves roughly 10–15% of Model S/X handle "failures" permanently. Do this before any physical inspection.
Diagnosing the Root Cause
Before ordering parts, spend 5 minutes on diagnosis:
| Symptom | Most Likely Cause | Fix |
|---|---|---|
| No presentation, no sound | Dead motor or no power | Check 12V battery, then motor |
| Clicks but doesn't move | Stripped/broken plastic gear | Gear replacement kit |
| Presents but door won't open | Microswitch failure | Replace switch or full handle |
| Intermittent presentation | Loose connector or worn gear | Clean connector, lubricate |
| Frozen in place | Ice or corroded pivot | Lubricate, apply heat |
| Works with app but not touch | Capacitive sensor failure | Clean handle, replace sensor |
Model S Door Handle Fix
The Model S door handle is notorious for failures. The handle contains a small motor, gear mechanism, and sensors that can all fail. The plastic gear is the most common failure point and costs under $50 to fix yourself.
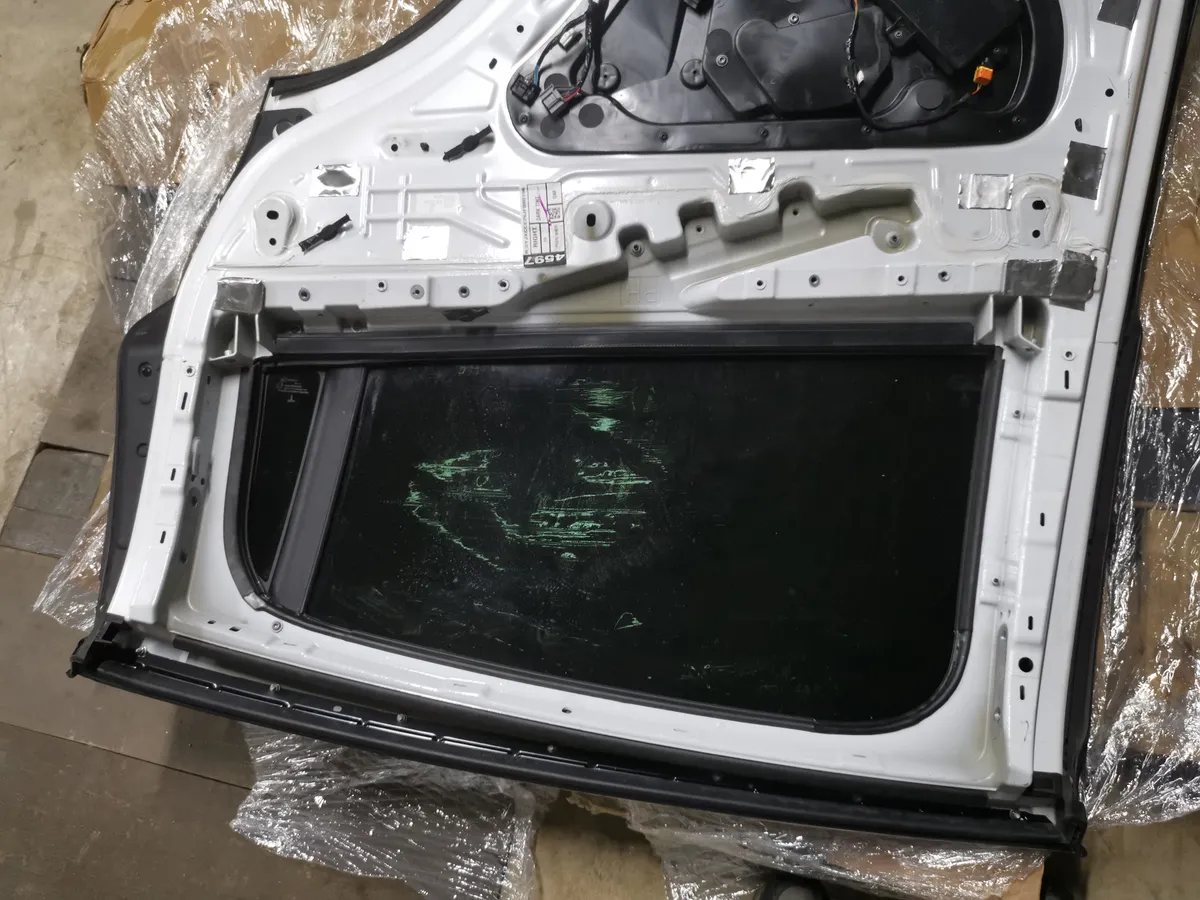 Inside a Tesla door panel — the handle mechanism, window regulator, and wiring are all accessible once the panel is removed.
Diagnosing the Problem
- No presentation at all: Usually a failed motor or gear — or low 12V voltage
- Clicks but won't present: Broken gear teeth (most common on 2012–2020 Model S)
- Presents but won't open: Microswitch failure
- Intermittent operation: Loose connection or worn parts
DIY Repair Steps
Step 1: Remove the Door Panel
- Open the door from inside using the interior release
- Remove the window switch panel using a trim tool
- Disconnect the electrical connector
- Remove the T25 Torx screws (usually 3–4)
- Carefully pry the door panel away from clips, starting from the bottom
- Lift the panel upward off the window frame clips
- Disconnect any remaining connectors (speaker, lighting)
Step 2: Access the Handle Mechanism
- Locate the door handle assembly inside the door cavity
- The handle is mounted with 3 bolts accessible from inside the door
- Disconnect the electrical connector to the handle
- Remove the mounting bolts
- Carefully extract the handle through the door opening
Step 3: Repair or Replace
For gear failure (most common):
- Replacement gear kits are available on Amazon (~$30–50): search Tesla door handle gear kit
- Disassemble the handle unit (4–6 small Phillips screws)
- Replace the broken plastic gear with the new one
- Reassemble and apply a thin layer of silicone grease to gear teeth
- Do NOT use petroleum-based greases — they degrade the plastic
For motor failure:
- Test motor with a 9V battery — it should spin freely
- Replace motor if dead (~$40–60 aftermarket)
For complete handle failure:
- Aftermarket handles available (~$150–250): search aftermarket Model S door handle
- OEM replacements from Tesla (~$300–500)
Torque Specs — Model S Door Handle:
- Handle mounting bolts: 9 Nm (80 in-lb)
- Window switch panel screws: 2 Nm (18 in-lb)
Reassembly
- Insert the repaired/new handle into the door
- Secure mounting bolts — torque to 9 Nm
- Reconnect electrical connector (apply a small amount of dielectric grease to the pins)
- Test handle operation before reinstalling door panel
- Reinstall door panel in reverse order — clips first from the top, then press firmly along the bottom
Model 3 & Model Y Door Handle Fix
These models have simpler mechanical handles but can still fail. The mechanism uses a physical button and cable-actuated latch. Common issues are debris blocking the mechanism, a broken return spring, or a frayed cable.
Common Issues and Quick Fixes
Issue 1: Handle won't push in (debris/ice)
- Apply silicone lubricant to the pivot points and button recess
- Work the handle button back and forth 10–15 times
- Clean any debris from the handle pocket with a soft brush
Issue 2: Door won't open when handle is pressed
- Usually a cable or door latch issue, not the handle itself
- Check the door latch actuator before replacing the handle
Issue 3: Handle button feels loose or floppy
- The internal pivot bushing is worn
- Full handle replacement needed — part is ~$30–60 aftermarket
Issue 4: Frozen handle (cold climates)
- Never yank or force a frozen handle — you'll break the button mechanism
- Use the Tesla app to start climate control — 10 minutes of heating will free a frozen handle
- Alternatively, use a hair dryer on low (2–3 minutes on the handle)
- Apply silicone spray to prevent refreezing
Full Handle Replacement (Model 3/Y) — Step by Step
Time Required: 45–60 minutes
Difficulty: Intermediate
Parts needed: Replacement handle assembly (~$30–80) — see options on Amazon DE or Amazon US
- Remove the interior door panel — see our door panel removal guide for the full procedure
- Locate the handle cable anchor point inside the door — it connects to the latch
- Unclip the cable end from the latch actuator
- Remove the two handle mounting bolts from inside the door cavity (T25 Torx)
- Push the old handle outward through the door skin — it may be held by a plastic retaining clip
- Feed the cable of the new handle through the door and push the handle into position
- Install mounting bolts hand-tight
- Reconnect the cable to the latch actuator — verify cable slack: there should be 3–5mm of play
- Torque mounting bolts to 9 Nm (80 in-lb)
- Reinstall door panel and test the handle 5–6 times before calling it done
Torque Specs — Model 3/Y Door Handle:
- Handle mounting bolts (T25 Torx): 9 Nm (80 in-lb)
- Door panel retainer screws (if any): 2–3 Nm
Emergency Entry: When the Handle Completely Fails
If the door handle is broken and you're locked out, here's how to get in:
Model 3 & Model Y — Emergency Interior Release:
The car has a mechanical release cable inside the door. If you're locked out from outside:
- Use your phone key or key card to unlock via the Tesla app
- If the door still won't open, there's a thin edge along the trailing edge of the door frame (B-pillar side) — a carefully inserted trim tool can actuate the latch
- From inside, the emergency release cable is behind the window switch panel — a single tug on the white tab opens the door mechanically
Full guide: Tesla Emergency Door Release
Model S/X — Emergency Entry:
- Use the Tesla app → Controls → Lock/Unlock to send a software command
- If app doesn't work, use key card on the B-pillar reader
- As a last resort, contact Tesla roadside assistance (1-877-79-TESLA)
Model X Falcon Wing Door Handle Issues
Model X front doors use the same handles as Model S. The falcon wing rear doors have different mechanisms that require separate diagnosis.
For falcon wing door issues:
- These require sensor calibration for most software-related problems
- Often need professional diagnosis for hardware failure
- Always check for software updates first — Tesla frequently fixes FWD issues via OTA updates
- Recalibrating via touchscreen resolves many issues without any hardware work
To recalibrate falcon wing doors:
- Go to Controls > Service
- Select Falcon Wing Door Calibration
- Follow on-screen instructions (ensure you have 3+ feet of clearance above and to the sides)
- The calibration takes ~2 minutes
For deeper Falcon Wing issues, see our Tesla Falcon Wing Door Fix guide.
When to Replace vs. Repair
| Symptom | Likely Fix | Cost (DIY) |
|---|---|---|
| Grinding noise on presentation | Gear replacement | $30–50 |
| No movement at all | Motor replacement or 12V check | $40–60 |
| Intermittent | Clean connectors, lubricate | $10–20 |
| Button feels mushy/floppy | Full handle replacement | $30–80 |
| Multiple handles failing | Check 12V battery | $0–150 |
| Under warranty or extended service | Tesla service | Check coverage |
Full Cost Breakdown
| Option | Parts | Labor | Total |
|---|---|---|---|
| Tesla Service Center | $80–500 | $300–500 | $400–1,000+ |
| DIY Gear Kit (most common fix) | $30–50 | Free | $30–50 |
| DIY Full Handle (aftermarket) | $30–80 | Free | $30–80 |
| DIY Full Handle (OEM) | $300–500 | Free | $300–500 |
Average DIY savings: $350–950 per handle.
Preventing Door Handle Failures
- Lubricate annually — Silicone spray on pivot points, button mechanism, and seals once per year (more often in cold/wet climates)
- Don't force frozen handles — Pre-condition via app first
- Keep handles clean — Dirt and grit accelerate wear in the button mechanism
- Address a weak 12V battery promptly — A dying auxiliary battery is a top cause of handle failures on Model S/X; see our 12V battery guide
- Park in a garage — Reduces temperature extremes and ice accumulation
- Check for open recalls — Tesla has issued handle recalls for certain Model S build years. Check your VIN at tesla.com/support
FAQ
Q: Why won't my Tesla door handle present when I approach? The most common causes are a failed micro motor inside the handle mechanism, broken plastic gear teeth, or a weak 12V battery. On Model S/X, try a soft reboot first (hold both scroll wheels for 10 seconds). If that doesn't work, a gear replacement kit (~$30–50) fixes the majority of cases. A 12V battery below 11.5V can also prevent handle presentation — check it first.
Q: How much does Tesla door handle replacement cost? Tesla Service Center charges $400–800+ per handle including labor. DIY repair with a gear replacement kit costs $30–50 (most common fix). A full aftermarket handle runs $30–80. OEM Tesla handles are $300–500 for the part alone. Most failures only require the gear kit.
Q: Can I open my Tesla if the door handle is broken? Yes. Model 3 and Model Y have an emergency mechanical release cable behind the window switch panel inside the door. From outside, use the Tesla phone app or key card to send an unlock command. See our Emergency Door Release guide for full details.
Q: How do I prevent Tesla door handle freezing in winter? Spray silicone lubricant on handle pivot points and door seals before winter. Pre-condition your Tesla via the app for 10–15 minutes — this warms the doors. Never yank a frozen handle. See our Tesla Winter Preparation Guide for a full cold-weather checklist.
Torque specs verified against Tesla Service Manual (service.tesla.com) — April 2026. Parts prices are approximate and vary by supplier.
Related Guides
- Tesla Door Panel Removal — Required first step for handle access on all models
- Tesla Emergency Door Release — How to get in when everything fails
- Tesla Door Latch Actuator Replacement — When the handle works but the door won't open
- Tesla Door Seal Maintenance — Keep seals healthy to prevent freezing
- Tesla Winter Preparation Guide — Full cold-weather prep including door handles
- Tesla Phone Key Not Working — Alternative entry if handle fails
- Tesla Frunk Won't Open — Front trunk latch troubleshooting

🛠️ Tools Needed for This Repair
These are the tools I personally use and recommend. Using quality tools makes the job easier and safer.
-
Trim Removal Tool Set
-
T25 Torx Screwdriver
-
Silicone Lubricant Spray
-
Tesla Door Handle Assembly (if needed)
-
Torque Wrench (0–25 Nm)
-
Dielectric Grease
-
iFixit Precision Screwdriver Set View on iFixit
-
iFixit Spudger View on iFixit
We earn commissions from qualifying purchases through our affiliate partners. This helps support the site at no extra cost to you.