Model Y Juniper Rear Bumper Removal & Tow Hitch Install
Some links are affiliate links. As an Amazon Associate I earn from qualifying purchases. Check vehicle compatibility before buying. How recommendations work.
We had a 2026 Model Y Juniper in the shop for rear-end work that also needed a factory tow hitch fitted — a perfect chance to document how the Juniper rear bumper actually comes off, what's behind it, and how the OEM hitch goes in. These are our own workshop photos, in the order the job really happens.
The short version: release the corner clips at the tailgate, free both wheel-arch liners and the hidden fasteners behind them, hook out the underbody clips, pull the sides off their rails, disconnect one harness connector, and the bumper comes away. The aluminum impact bar behind it unbolts, and the tow hitch crossmember takes its place.
What you're working with
- Trim pick / hook tools — nearly every fastener on this job is a hidden clip
- Screwdriver / small driver for the arch liner fasteners
- 15 mm socket for the impact bar nuts
- Gloves and a good work light — most of the clips you'll find by feel, not sight
Step 1 — Start at the tailgate corners
Open the tailgate. The upper corners of the bumper clip to a rail beside the taillight opening. Work a pick behind the corner trim and release the clips one by one — you can see the clip rail once the corner starts to separate.
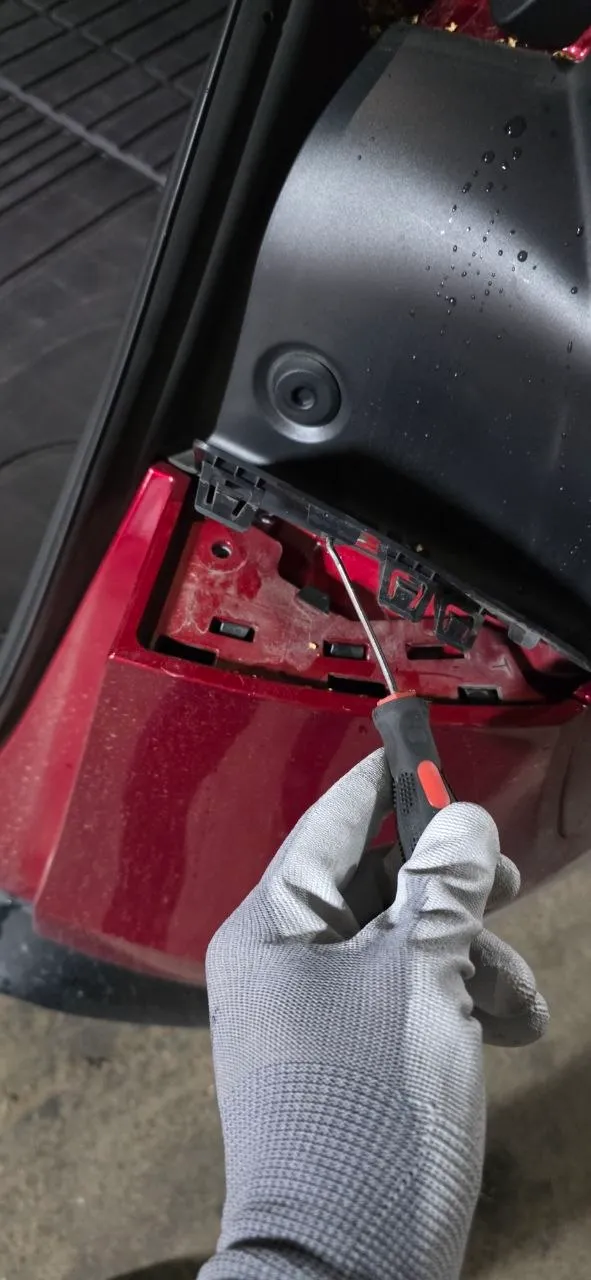 The corner clip rail sits just inside the tailgate opening — release it with a pick, not by pulling on the painted panel.
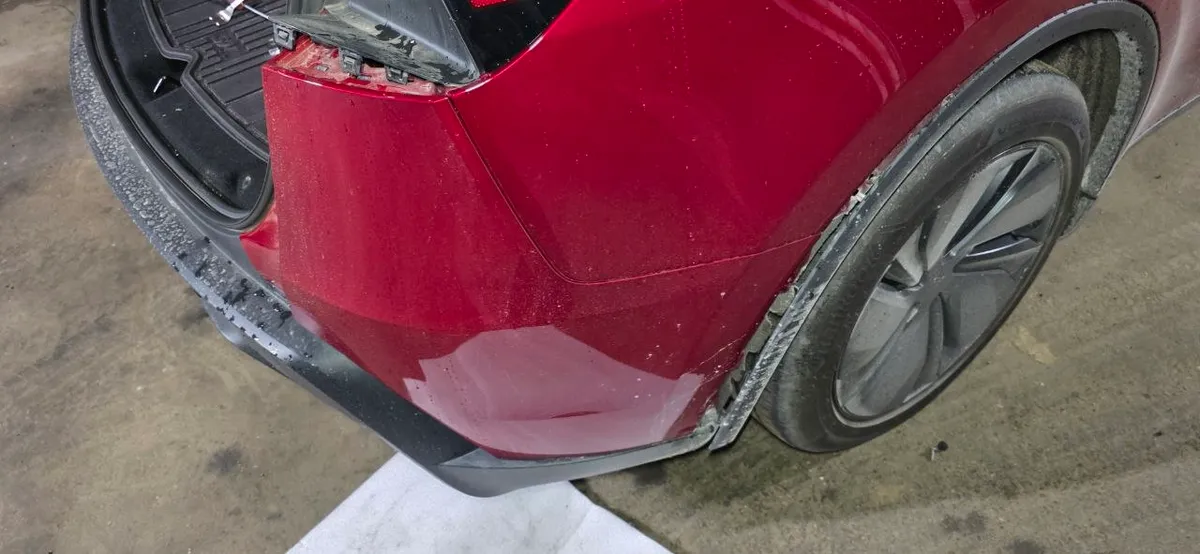 Corner released at the taillight area. Work hands-width by hands-width — the rail runs the whole corner.
Step 2 — Wheel arch liners and the hidden fasteners
Move to the wheel arches. The liner edge fastens to the bumper lip; release the fasteners along the edge, then peel the liner back.
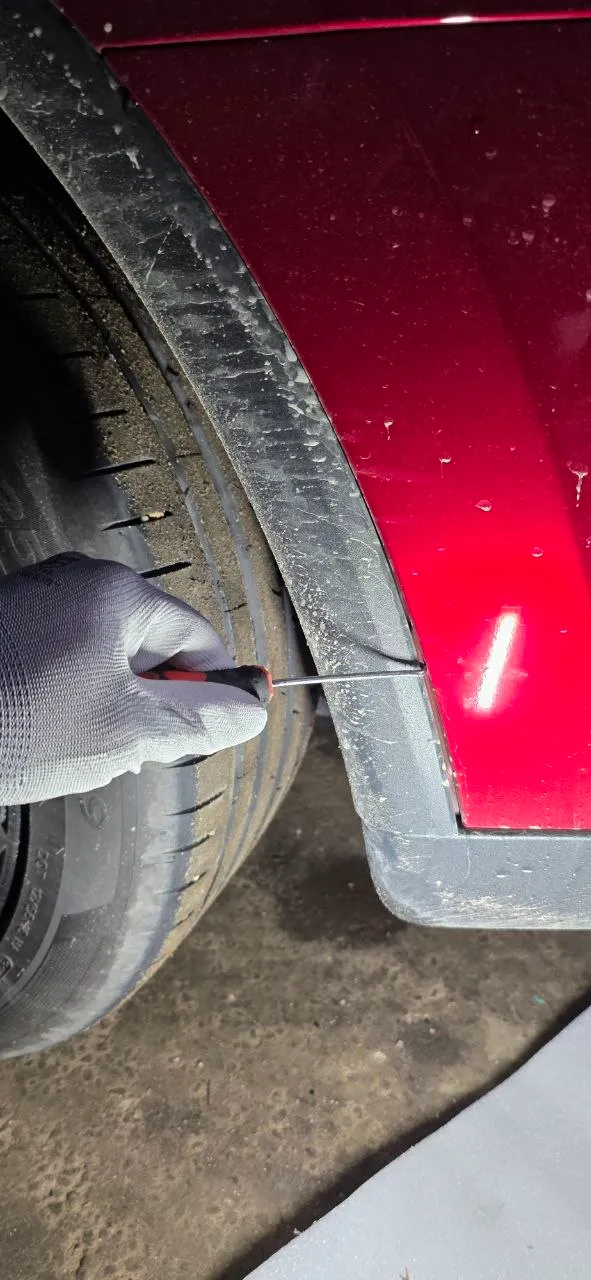 The arch liner meets the bumper along this lip — release it fastener by fastener.
Behind the liner hides the fastener most people miss:
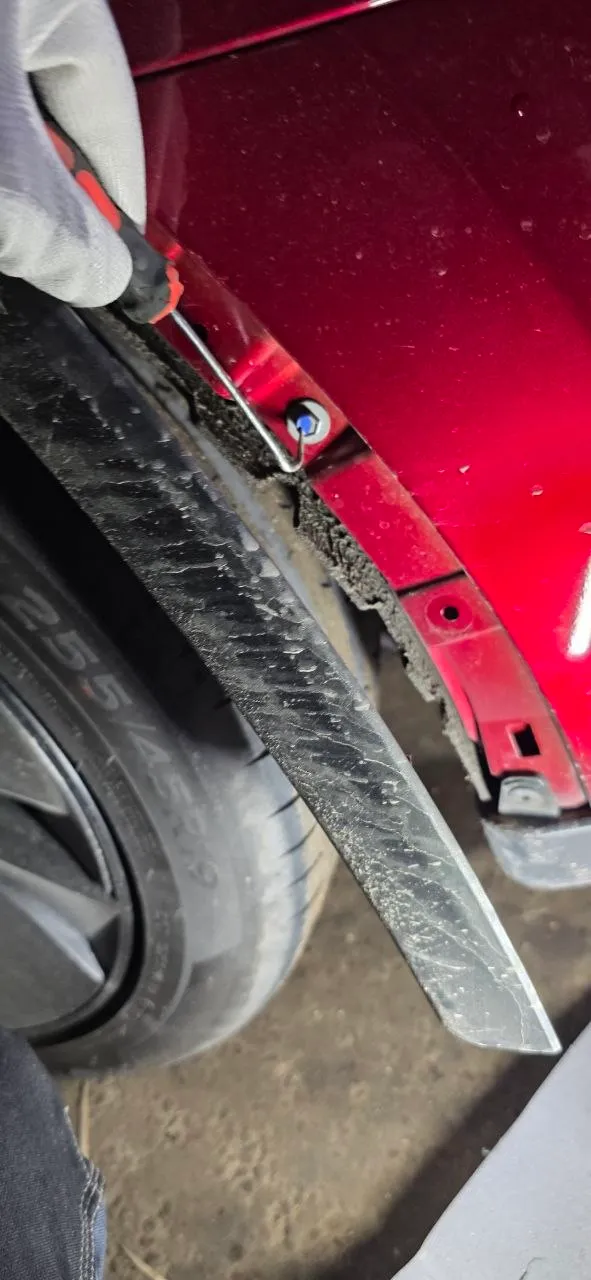 Peel the liner back and you'll find a bumper fastener on a stud behind it — one per side. (Juniper on 255/45 R19s, for reference.)
Step 3 — Underbody clips
Under the car, a row of hook-style clips holds the diffuser/lower bumper edge to the underbody panel. A hook tool pulls them free.
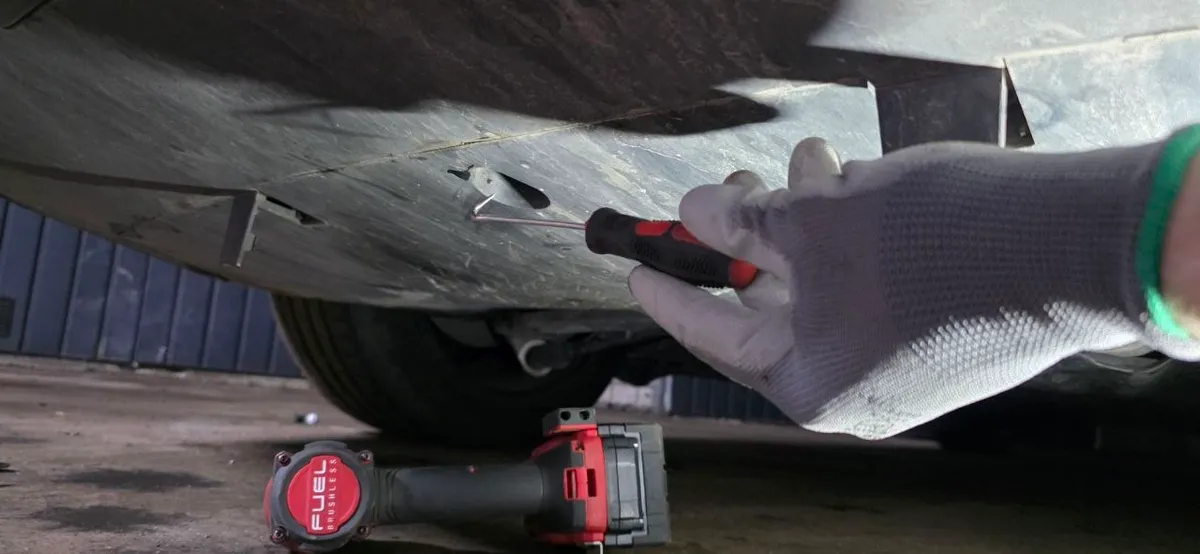 The lower bumper/diffuser clips to the underbody panel along this seam.
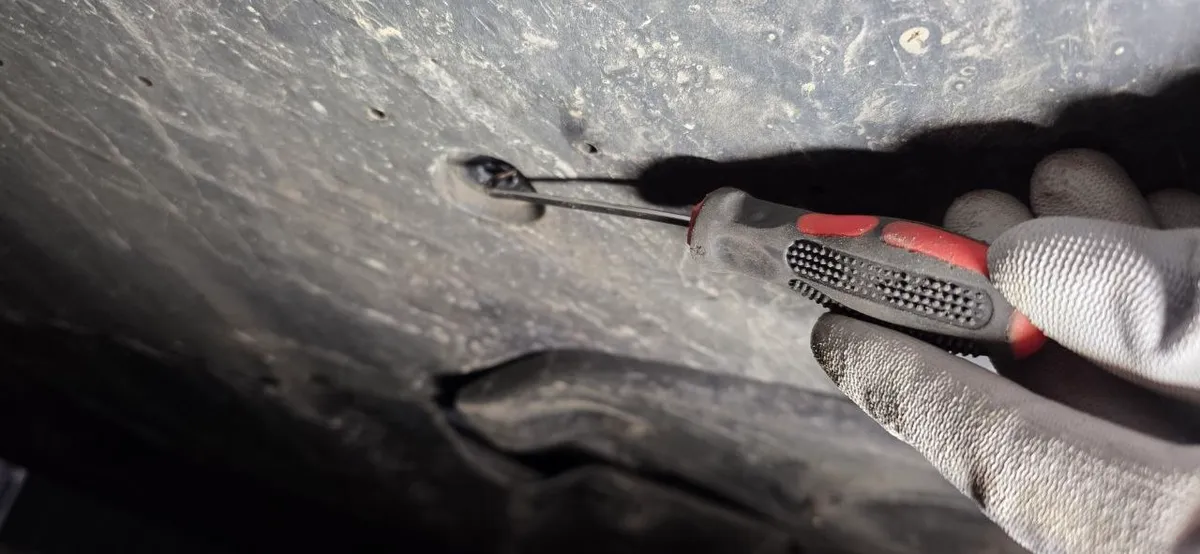 The clips release cleanly with a pick or flat driver — don't tear them out.
Step 4 — Free the sides
With corners, arches, and underbody released, the side sections pull off their clip rails. Support the bumper as it comes free.
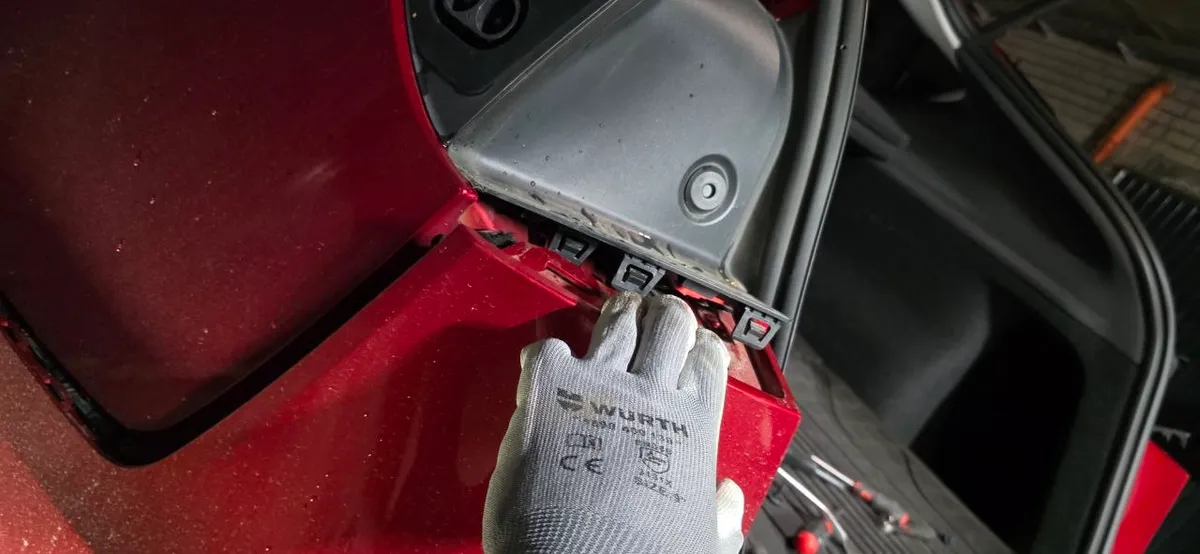 The side rail beside the taillight opening — the bumper's tabs hook into these slots.
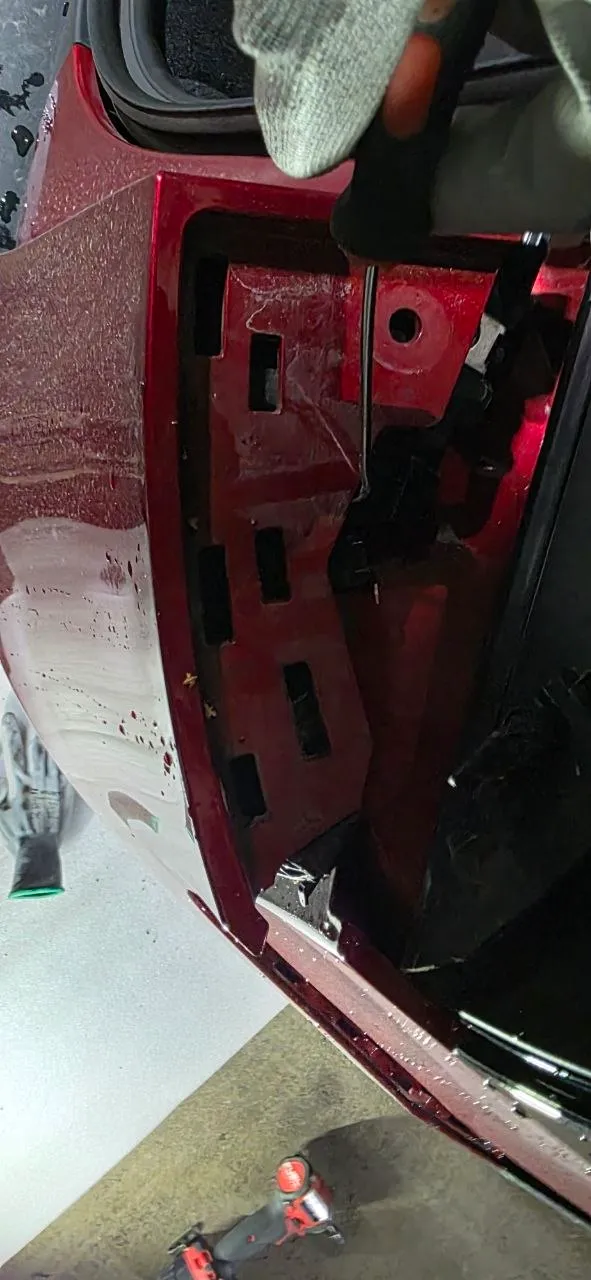 What the corner engagement looks like once released — slots on the bumper, rail on the body.
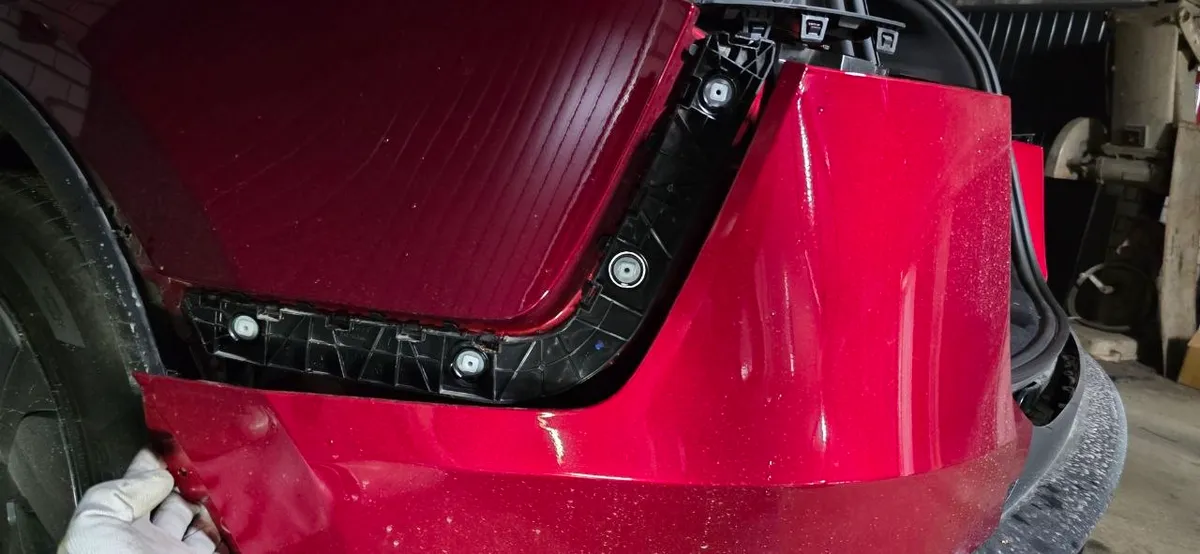 Corner fully free. The bracket stays with the bumper; the receiver clips stay on the body.
Step 5 — Disconnect the harness, bumper off
Before the bumper comes away completely, disconnect its wiring harness — support the panel, release the connector lock with a pick, and unplug.
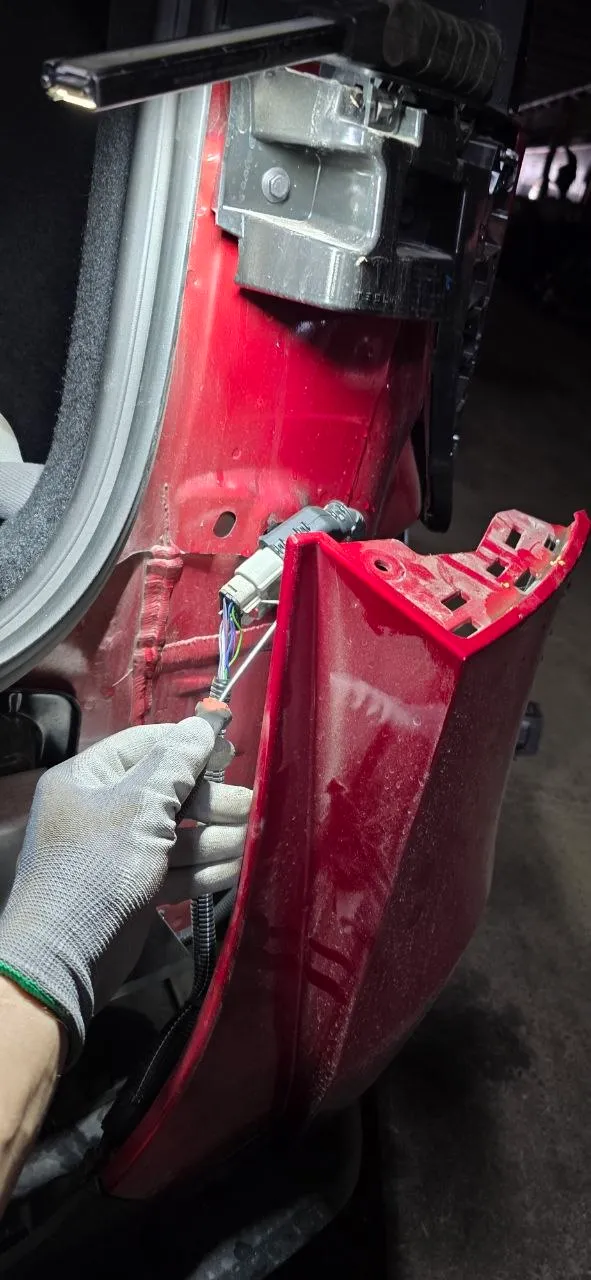 One connector feeds the bumper. Support the panel — don't let it hang on the wires.
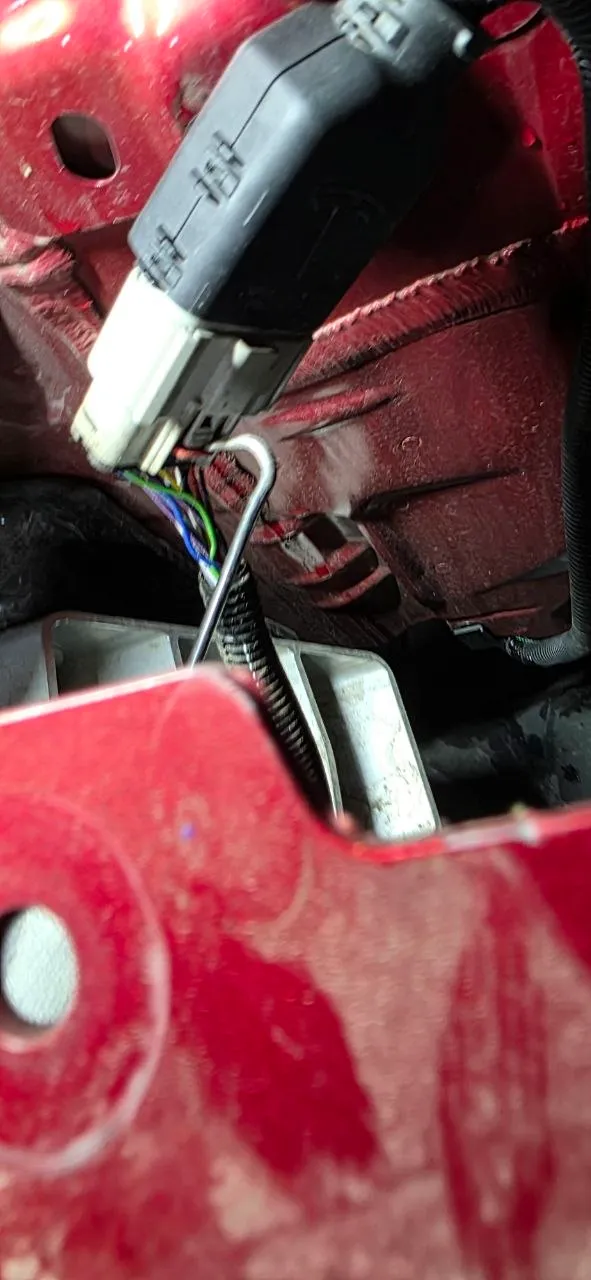 The lock tab releases with a pick — no force needed.
Set the bumper and diffuser down on foam, outer face up, somewhere it can't get scratched.
Step 6 — The impact bar (collision bar)
Behind the bumper sits the aluminum impact bar — the structural crash member. On an untouched car you'll see the factory paint marks still on the nuts.
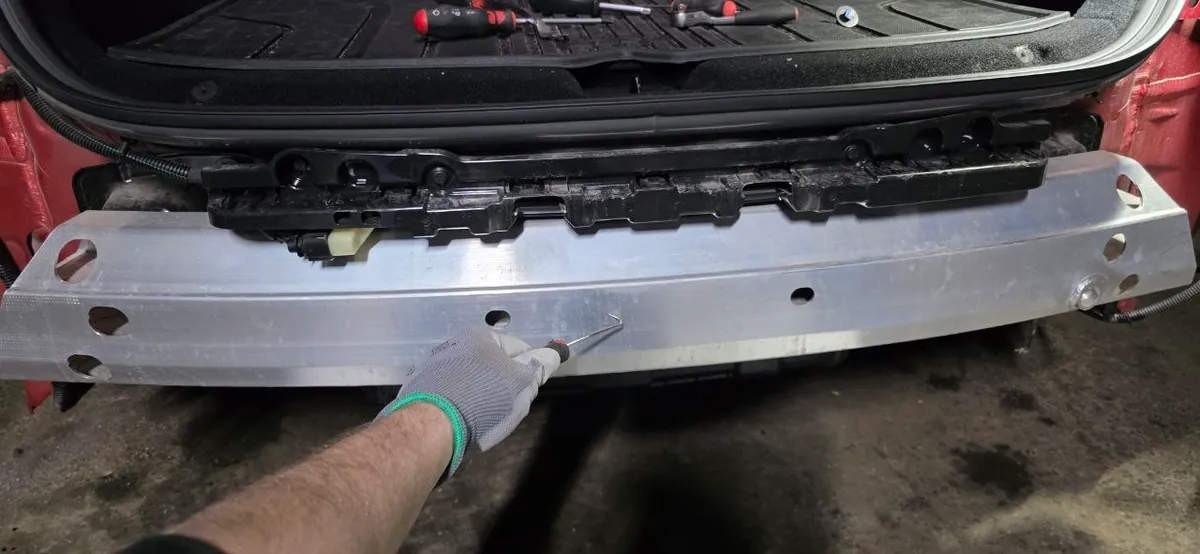 The aluminum impact bar spans the full rear behind the bumper carrier.
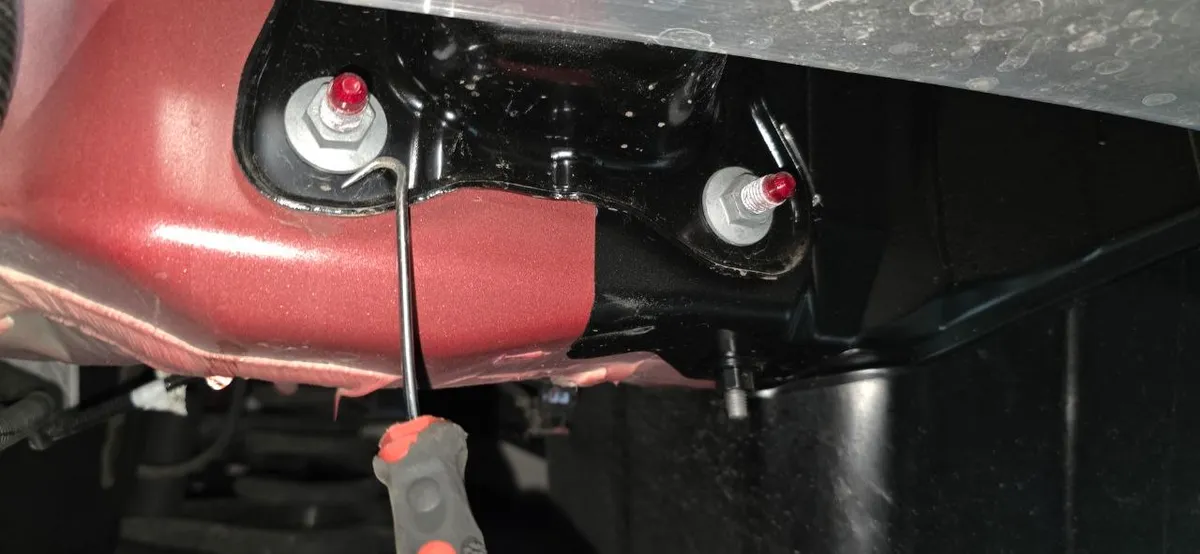 Red factory paint marks on the mounting nuts — this bar has never been off.
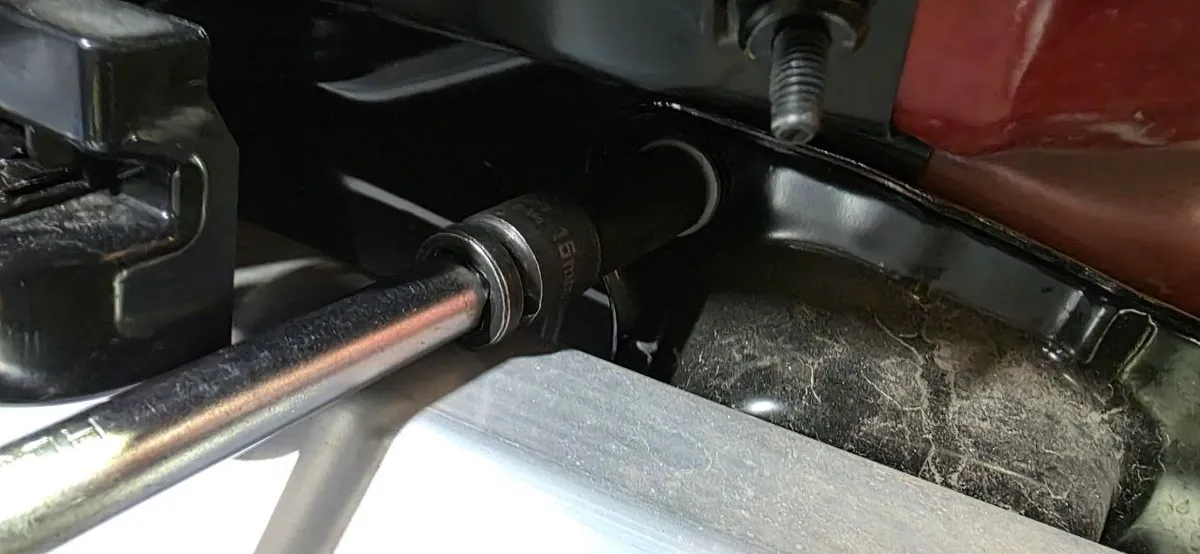 The bar nuts take a 15 mm socket. Torque to the service manual spec on reassembly.
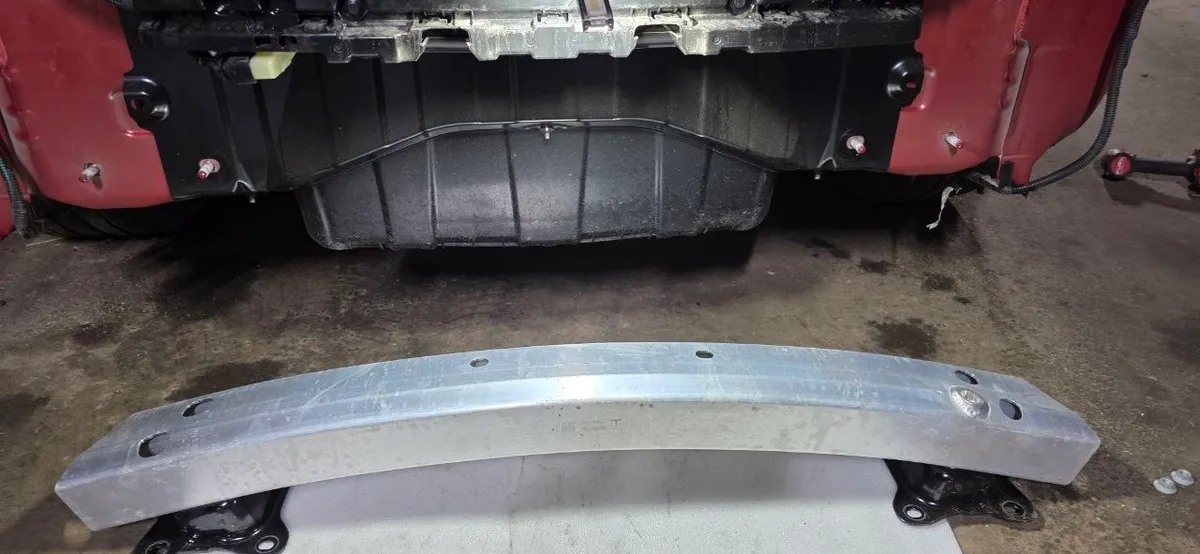 Bar off. If this part is bent from a collision, it gets replaced with new OEM — a crash-energy component is never straightened.
Step 7 — The OEM tow hitch goes in
The tow package (built by Oris for Tesla) arrives as a complete assembly: the crossmember with the coupling receiver in the middle, the trailer control module already mounted, and the wiring harness.
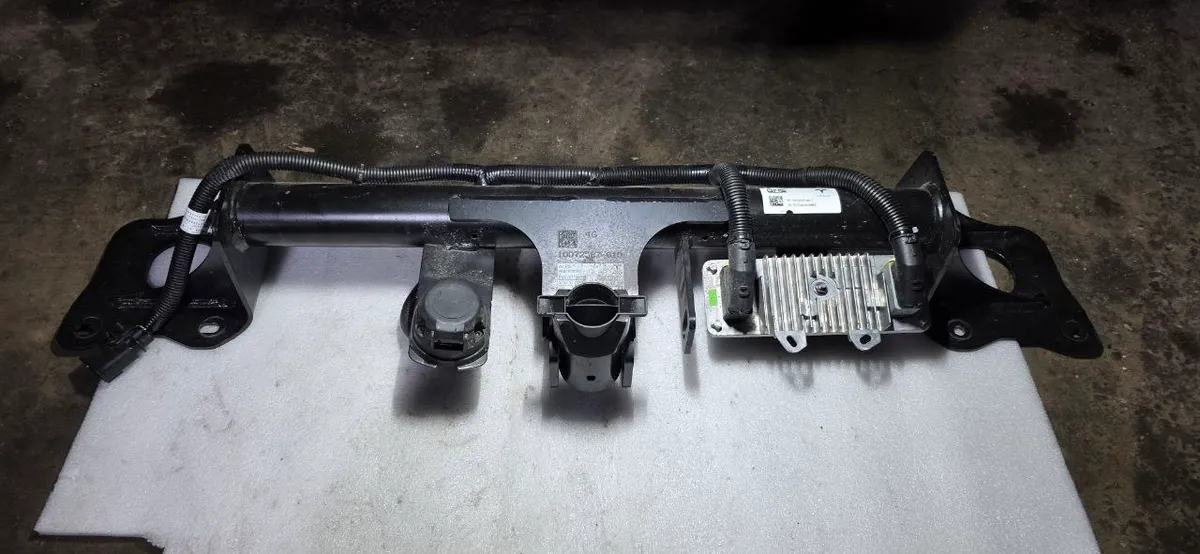 The OEM kit: crossmember, coupling receiver, socket bracket, pre-mounted trailer module, and harness.
The crossmember bolts up where the impact bar sat. Route the harness up through the body opening and plug it into the factory connector.
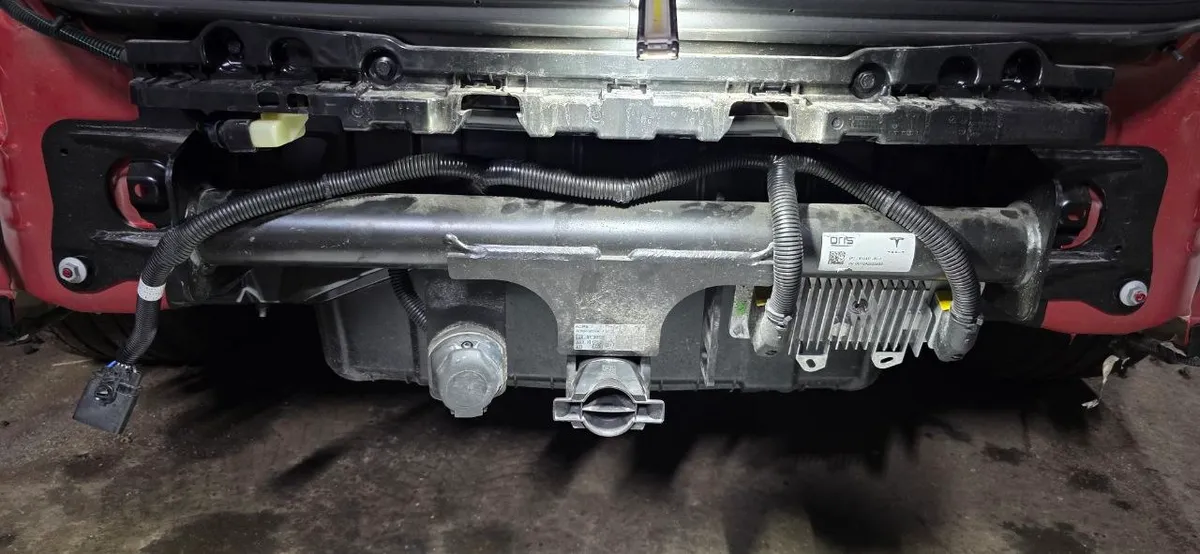 Hitch crossmember installed in place of the impact bar, trailer module on the right, wiring routed.
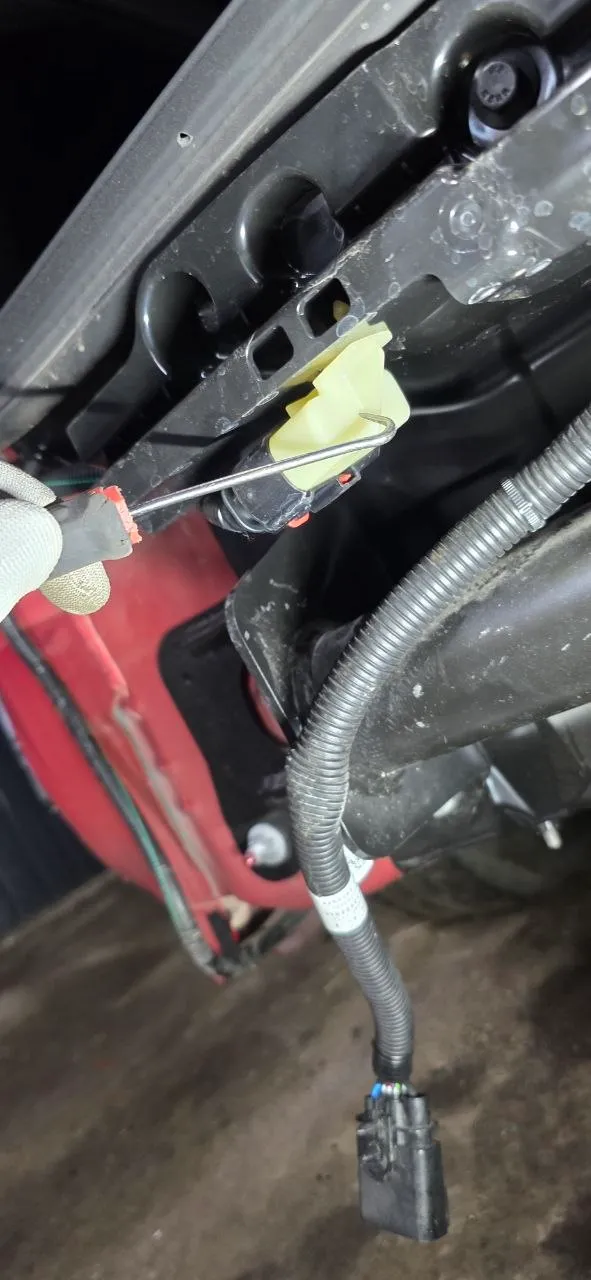 Feed the harness up through the body opening — a hook tool helps guide it without pinching.
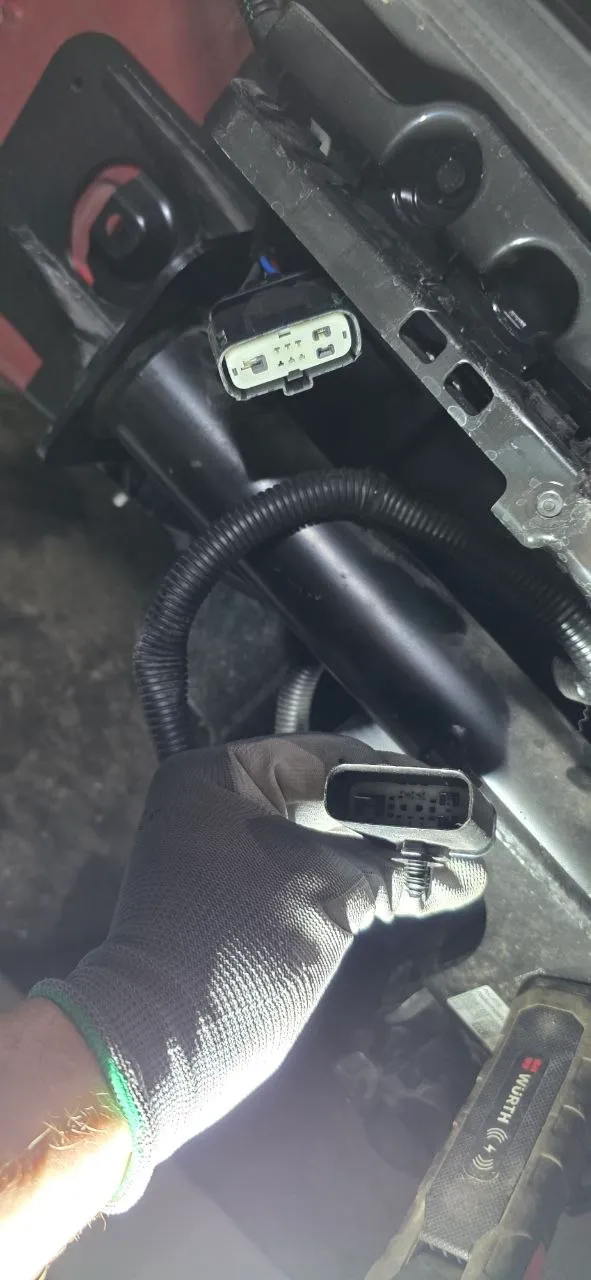 The kit's harness meets the car's factory connector — plug until the lock clicks.
Software note: if the car didn't come with factory towing, the hardware alone won't wake up Trailer Mode — it's enabled in the vehicle configuration, which a shop with Tesla Toolbox access sorts out after the install.
Step 8 — Reassembly
Everything goes back in reverse: harness, sides onto their rails, underbody clips, arch fasteners, corners last. Two things worth the extra minute:
- Replace any tired clips. A missing or cracked clip is tomorrow's rattle and uneven panel gap.
- Check the gaps along the taillights and quarter panels before calling it done — see our panel gap guide.
Parts for this job
For OEM collision parts — impact bars, bumper covers, brackets and clips — genuine is the only sensible choice on structural pieces. Our shop sources through RR Car Parts (genuine Tesla parts, EU shipping).
Related guides
- Tesla RCM Replacement & Post-Crash Reset — the other half of rear-collision work
- Tesla Model 3/Y Rear Bumper Removal — the pre-Juniper version of this job
- Tesla Tow Hitch Installation: Model 3 & Y — OEM vs aftermarket options compared
- 2026 Model Y Juniper: Known Problems & Fixes
- Tesla Panel Gap Adjustment — for the final fit check
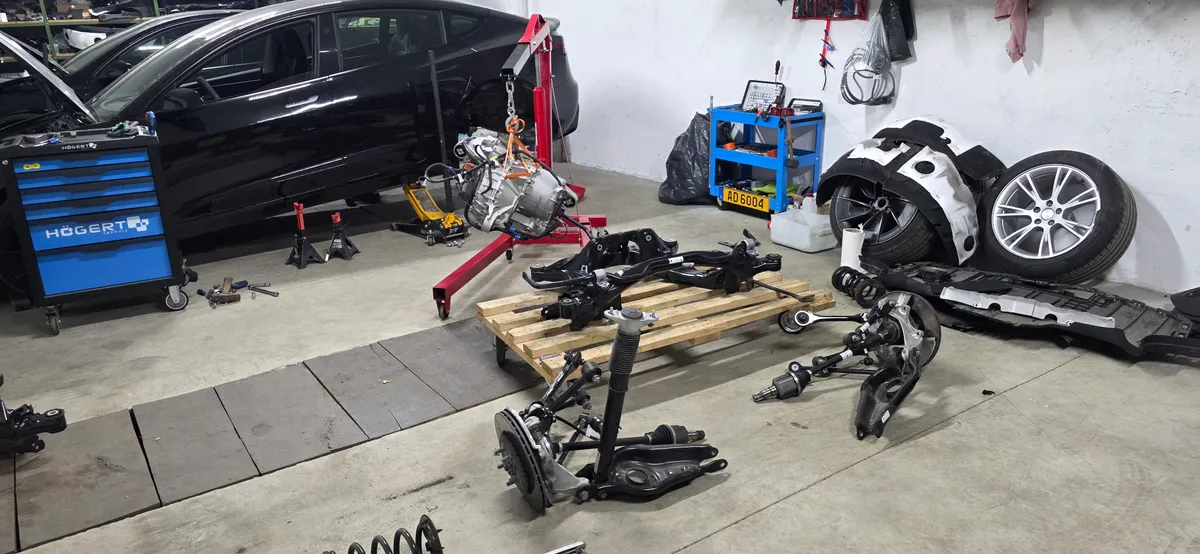
Tools and parts to check
Match the tool or part to your vehicle and the procedure before ordering. Search links show listings, not a verified fit. Check the seller's specifications, delivery region and current price.
- iFixit Plastic Pry Tools
- iFixit Pro Tech Toolkit
- OEM Tesla Collision Parts (EU)
Some links earn a commission from qualifying purchases. Storefront availability and compatibility vary.