Tesla Model 3 Side Mirror Replacement: Complete DIY Guide
Side mirror damage is one of the most common Tesla repairs—whether from a parking mishap, passing cyclist, or road debris. Tesla service centers charge €400-600+ for mirror replacement, but with some patience you can do it yourself for just the cost of the part (€150-300 depending on source).
This guide covers the complete process for 2017-2023 Model 3. Note: Tesla's official procedure involves full door trim panel removal, but many DIYers access the mirror through just the A-pillar area. We'll cover the simplified approach here—for full door panel removal, consult the Tesla Service Manual.
 Old mirror (black) next to replacement (blue). Both have wiring harnesses with connectors for power, heating, and adjustment motors.
When to Replace vs. Repair
Before ordering a new mirror assembly, assess the damage:
- Mirror glass only cracked: Just the glass insert can be replaced (€30-50, pops out)
- Mirror cap/cover damaged: Caps are replaceable separately (€50-80)
- Motor/adjustment broken: Usually requires full assembly replacement
- Housing cracked or mounting broken: Full assembly replacement needed
This guide covers full mirror assembly replacement—the most common repair after collision damage.
What You'll Need
Time: 30-45 minutes per side
Parts:
- Replacement mirror assembly (must match side: LH/RH)
- Ensure it matches your car's features (heated, auto-dim, folding)
Tools:
- T30 Torx screwdriver (for door trim screws)
- 10mm socket and ratchet (mirror mounting bolts)
- Plastic pry tools (essential—metal tools will scratch trim)
- Microfiber cloth (protect interior surfaces)
Step 1: Access the Mirror Mounting Area
The mirror bolts are accessible from inside the door. You'll need to remove the door panel or access through the A-pillar area.
1.1 Open the front door fully and lower the window.
1.2 Remove the door panel or A-pillar trim to access the mirror mounting area. Use plastic pry tools to avoid scratching.
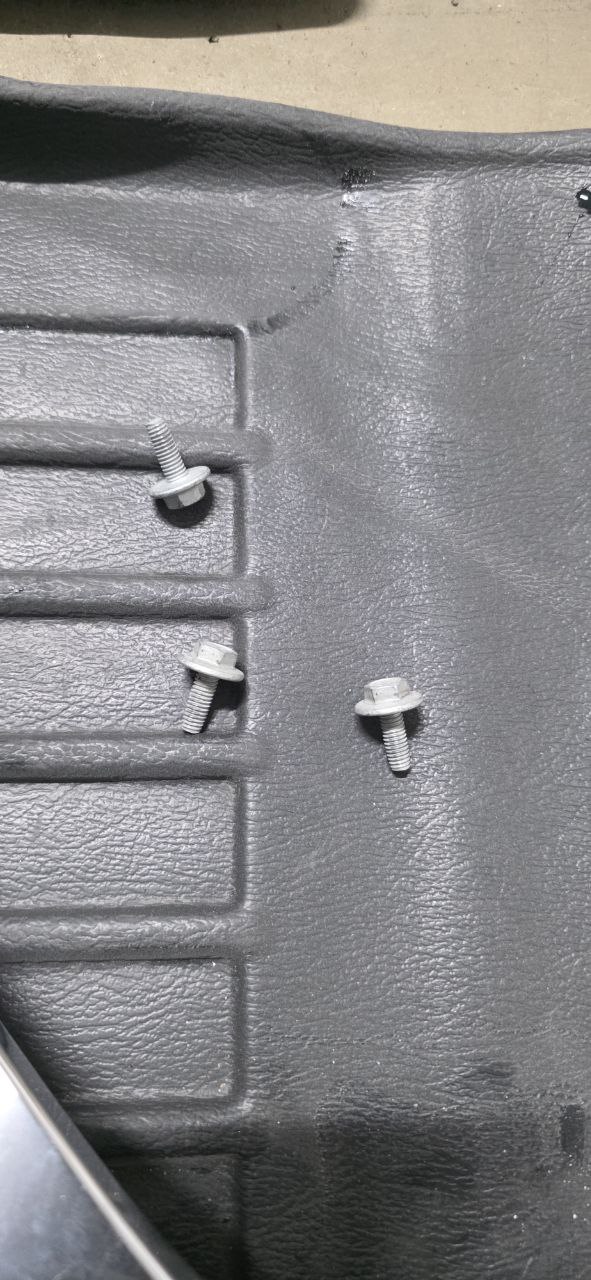
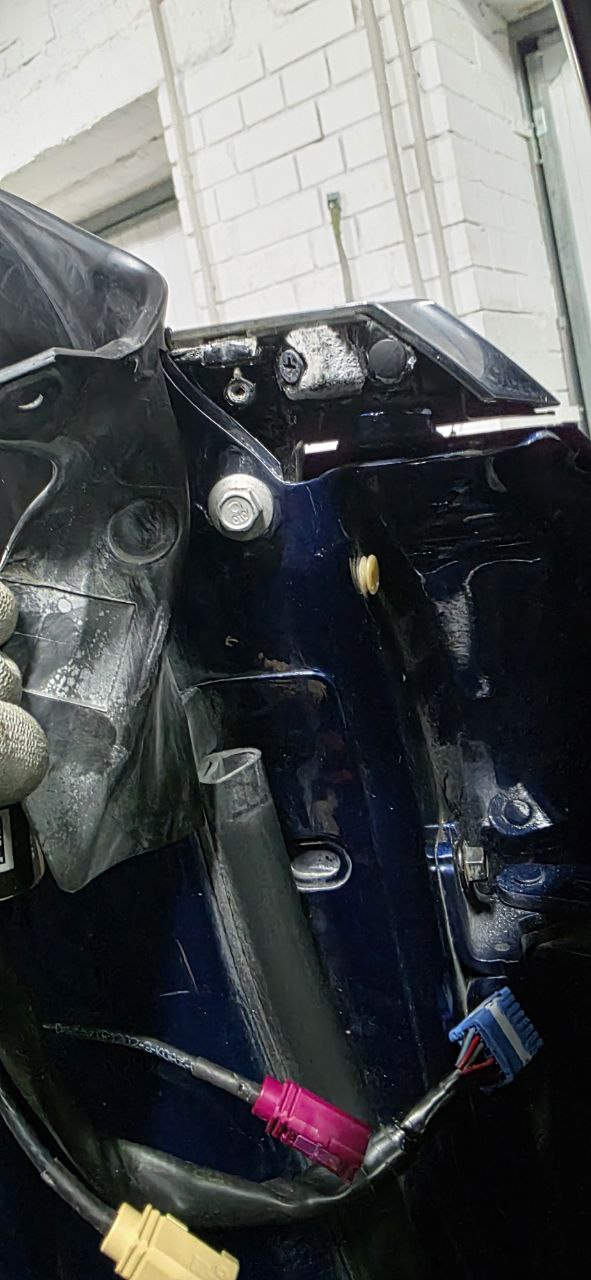
 Mirror mounting bracket exposed on the door. The three bolt holes and wiring grommet are visible. Note the triangular A-pillar trim area above.
1.3 On premium audio vehicles, disconnect the tweeter speaker connector before fully removing trim pieces.
Step 2: Disconnect Mirror Wiring
With the mounting area exposed, you'll see the mirror's wiring harness with multiple connectors.
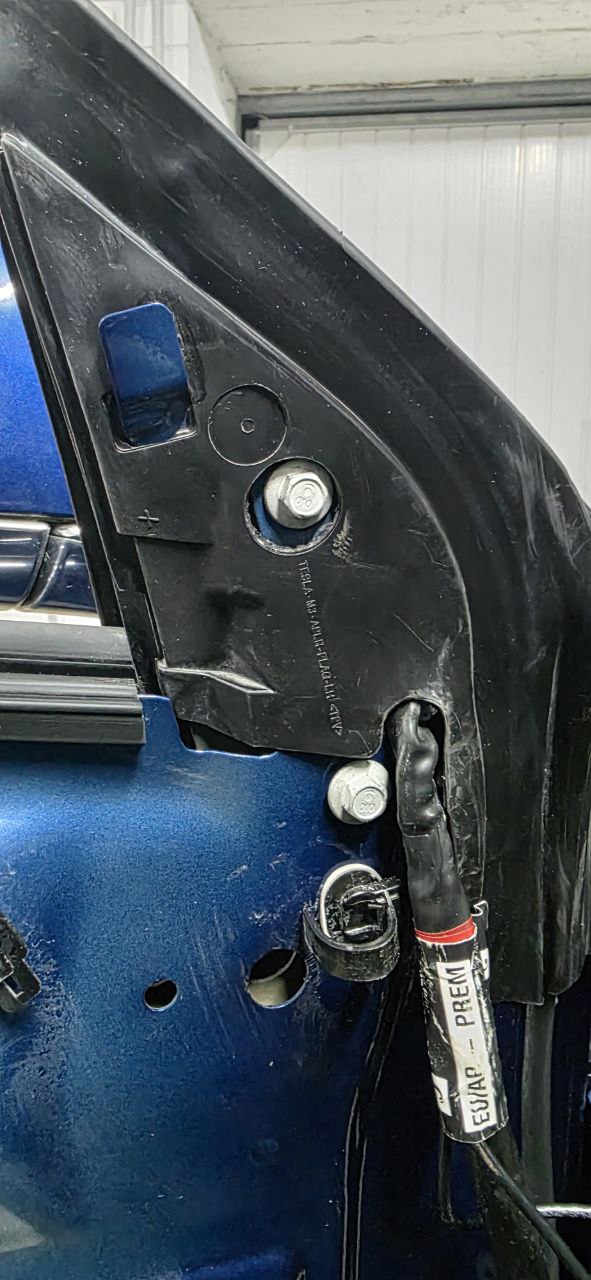
 Mirror connectors: Pink and beige are FAKRA-style connectors, blue is the main mirror harness connector. The "EU/AP PREM" label indicates European market with Premium Connectivity.
2.1 Locate the connectors:
- Pink FAKRA connector: Data/signals
- Beige/Tan FAKRA connector: Additional signals
- Blue connector: Main mirror power (heating, adjustment motors)
2.2 To disconnect: press the release tab and pull straight out. Don't twist or you'll damage the pins.
 Wider view of door interior with connectors disconnected. You can see the speaker (bottom left) and the wiring routing through the door.
2.3 Push the wiring grommet through the door opening to free the harness.
Step 3: Remove Mirror Mounting Bolts
 Back of the mirror assembly showing the three 10mm hex mounting bolts. These secure the mirror bracket to the door.
3.1 Locate the three 10mm hex bolts holding the mirror to the door. The foremost bolt may be partially hidden under the glass run seal—peel it back gently.
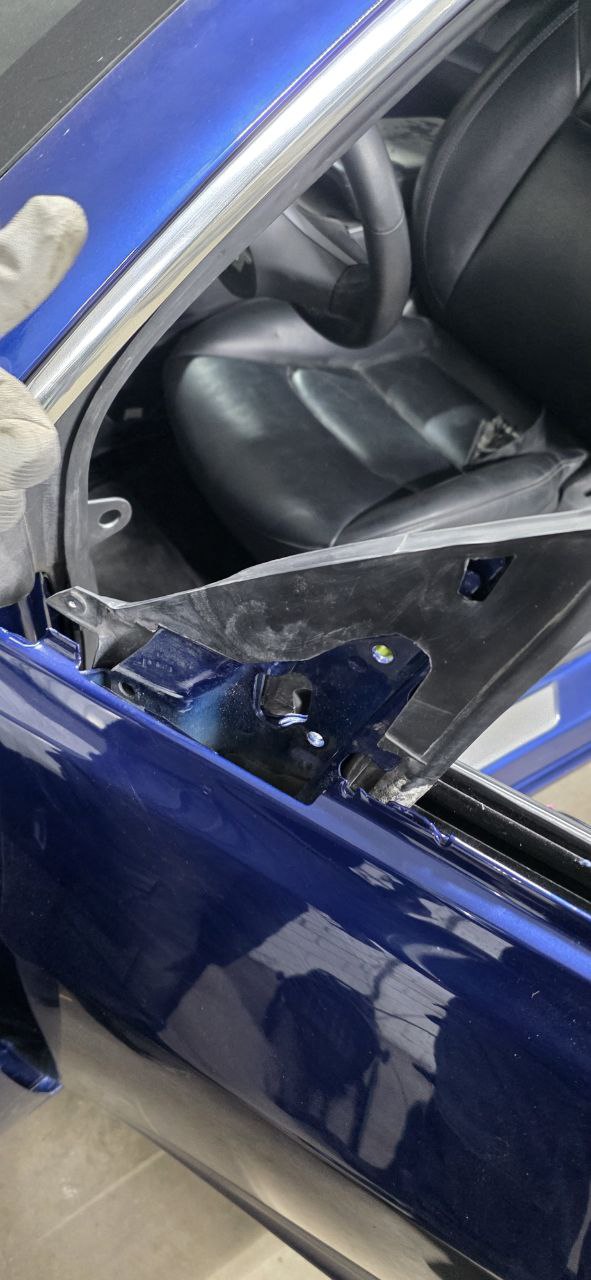
 Mirror mounted on door showing the three bolt positions and harness routing. Note the "EU/AP PREM" label on the wiring harness and the grommet where wires pass through.
3.2 Support the mirror with one hand while removing bolts—don't let it fall and scratch the paint.
3.3 Remove all three bolts and carefully lift the mirror away from the door, guiding the harness through the opening.
Step 4: Install New Mirror
4.1 Test-fit the new mirror before fully installing. Verify:
- Correct side (driver/passenger)
- Connector types match your vehicle
- Color match (or plan to swap caps from old mirror)
4.2 Route the wiring harness through the door opening first, then position the mirror.
4.3 Hand-thread all three bolts before tightening to ensure proper alignment.
4.4 Tighten bolts in a star/cross pattern to 15 Nm (11.1 ft-lb). Use hand tools only—do not use impact drivers.
4.5 Reconnect all connectors:
- Pink FAKRA → Pink port
- Beige FAKRA → Beige port
- Blue connector → Blue port
Ensure each connector clicks fully into place.
Step 5: Reinstall Trim and Test
5.1 Reconnect the tweeter speaker connector (if equipped with premium audio).
5.2 Reinstall the door panel or A-pillar trim, pressing firmly on clip locations until they snap in.
5.3 Reinstall any T30 Torx screws that secure the trim.
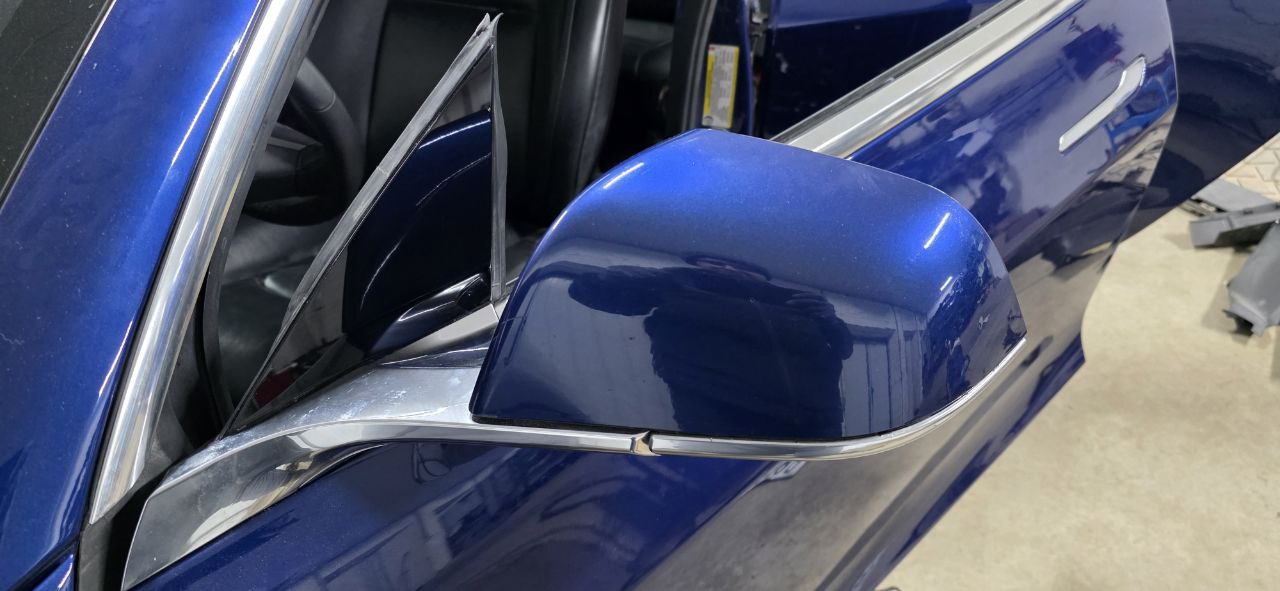 Completed installation. The new mirror sits flush with the door and matches the body lines perfectly.
Step 6: Verify All Functions
Before calling it done, test everything:
- [ ] Mirror adjustment (all directions via touchscreen)
- [ ] Mirror folding (if equipped)
- [ ] Heated mirrors (enable in climate settings)
- [ ] No warning messages on screen
The mirror should sit flush with the door with no gaps around the base.
Troubleshooting
Mirror doesn't adjust:
- Check connectors are fully seated
- Verify connector pins aren't bent
- Try toggling the mirror selector (L/R) on the touchscreen
- If replacing due to motor short: Reset the body controller in Service Mode:
Low Voltage > Power Distribution > Reset VCLeft(orVCRightfor passenger side)
Mirror vibrates at speed:
- Mounting bolts not tight enough (should be 15 Nm)
- Bracket may be damaged—inspect for cracks
Connectors won't click in:
- Check for debris in the connector
- Ensure correct orientation (colors should match)
Parts Sources
| Source | Price Range | Notes |
|---|---|---|
| Tesla Service | €350-500 | OEM, includes labor |
| RR Car Parts | €150-250 | OEM takeoffs, EU shipping |
| eBay | €100-300 | Verify seller, check fitment |
| Aftermarket | €80-150 | Quality varies, motors may fail early |
Related Guides
- Tesla Door Panel Removal — Full door panel access procedure
- Tesla Window Reset Calibration — If window acts up after door work
- Tesla Screen Black Fix — If touchscreen issues arise
This guide was created from a real Model 3 mirror replacement at an independent Tesla repair shop in Lithuania. Photos show the actual repair process. Always verify procedures against Tesla service documentation for your specific model year.

🛠️ Tools Needed for This Repair
These are the tools I personally use and recommend. Using quality tools makes the job easier and safer.
-
T30 Torx Screwdriver
-
Plastic Pry Tools
-
10mm Socket
-
Tesla Model 3 Side Mirror Assembly RR Car Parts 🇪🇺
-
iFixit Pro Tech Toolkit View on iFixit
We earn commissions from qualifying purchases through our affiliate partners. This helps support the site at no extra cost to you.